How To Repair Damaged Cables Using Wraparound Cable Repair Kits
Published 20 May 2025

Installing Filoform cable repair kits
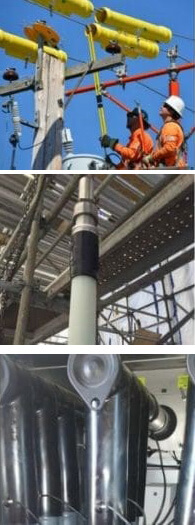
Integrity of the cable is of prime concern in mission-critical infrastructure.
Whether maintenance is being performed in utilities, telecommunications, or industrial power systems, damaged jacket cables significantly degrade operations and safety. Filoform Heat Shrinkable Reinforced Wrap Around Cable Jacket Repair Sleeves offer a tough, field-proven repair solution for on-site repair of cables, offering durability, environmental sealing, and mechanical protection.

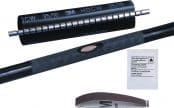
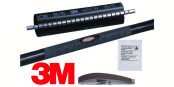
Filoform Jacket Repair Sleeve
The Filoform cable repair sleeve is engineered for reliability in hostile environments. This metal-reinforced, heat-shrinkable wraparound sleeve enables fast, permanent cable jacket repair without cable movement or disconnection.
Cable Repair Product Features
- Heat-activated seal with hot melt adhesive
- Metal channel closure for mechanical reinforcement
- Extensive cable diameter compatibility
- Application for indoor and outdoor use when repairing damaged cables
Cable Repair Installation Guide
Important: Use a soft yellow flame (not pencil type). Always direct heat in the direction of shrinking and maintain a sweeping motion to avoid scorching. Begin shrinking from the centre outward. Ensure uniform shrinking and proper adhesive oozing.
Ensure performance perfection with this precise installation procedure:
Step 1: 
Action: Degrease, clean, and dust the cable surface where the sleeve will be applied.
✅ Use solvents that are compatible with the cable material.
✅ Clean 100 mm on both sides of the damaged section.
Step 2: 
Action: Abrade the outer jacket of the cable using abrasive tape or sandpaper.
✅ Roughen 100 mm on each side of the damage for optimal adhesion.
 Step 3: Remove the Adhesive Film
Action: Peel off the release liner from the adhesive-coated inner surface of the sleeve.
 Step 4: Apply the Sleeve and Insert the Metal Channel
Action: Wrap the sleeve around the cable and slide the metal channel along the overlap to lock it.
✅ Extend the channel 10 mm beyond both ends of the sleeve.
✅ Confirm that the sleeve fits snugly around the cable.
Step 5: Start Heat Shrinking at the Center
Action: Begin applying heat at the centre of the sleeve and work outward.
✅ Apply uniform heat all around the sleeve.
✅ Focus extra heat along the metal channel.
✅ If necessary, bend the channel to follow the cable’s contours.
Step 6 Monitor Adhesive Flow

Action: Look for hot melt adhesive uniformly oozing from all edges.
✅ This indicates a secure and sealed installation.
✅ Let the sleeve cool fully before applying any mechanical stress.