How To Locate An Oil Leak In A 12km Circuit Of LPOF PILC 115KV Direct Buried Cable
Published 10 Aug 2020
All Images Courtesy Of: Douglas Page (Instructor & Cable Splicer at Hydro One Training and Development Services) ![]()
High Voltage Cables
Fluid Filled Cable Leak Detection
33kV 66kV 132kV 245kV 400kV
Fluid filled high voltage cables have been used for over 80 years with some circuits installed in the 1930’s still operating successfully today without any deterioration.
The fluid contained within a fluid filled cable has to be kept at a positive pressure under all conditions of loading and ambient temperature change.
Fluid filled cables rely on the presence of pressurised cable fluid to work efficiently – if the circuit suffers an oil leak the cable network is compromised.
The pressure used depends on a number of factors:
- Voltage and size of cable
- The length of the cable
- The route the cable follows
- Whether the cable has a leak


The fluid forms an integral part of the high voltage cable insulation and prevents the formation of voids in the lapped papers around the conductor – also the cable fluid aids the conduction of heat away from the conductor allowing the cable to be run efficiently than a cable without it.
The following photo sequence shows how to find a single drip of oil in approximately 12km of Single Core LPOF PILC 115KV direct buried cable.
LPOF Low Pressure Oil Filled
PILC Paper Insulated Lead Covered
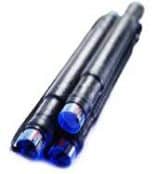
1. Cathodic lead erosion is clearly visible on the EHV power cable – this is usually caused by ground factors such as gas mains, neighbouring cable circuits, water mains etc. The aged underground EHV cable is suffering natural degradation and overtime a deterioration in the cables normal cathodic protection has caused service issues with the cable circuit – the cable becomes the sacrificial anode and starts to break down.

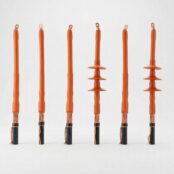
2. Cable type: Transmission & Distribution Voltage – 115kV LPOF PILC Single Core.

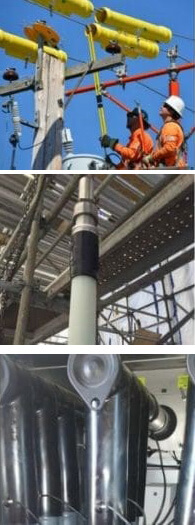
3. LPOF EHV cables are monitored by gauges and pressurised by pre-pressurised tanks with internal baffles, that expand and contract with the cable, maintaining a constant pressure. If the pressure cannot be maintained, an alarm is triggered.

4. To find the oil leak in 10, 15, 20, or 100km of cable, it all starts the same way. Find the approximate centre of the cable circuit, excavate safely and install a cable freeze.

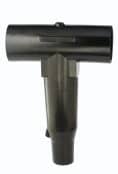
5. Very similar to a pipe type freeze, the coil must be installed on the bare lead.

6.

7. Along with a freeze, to monitor the temperature, the EHV jointer/splicer must install thermocouple temperature monitors which consist of two conductors of dissimilar metals that react to the temperature change differently allowing the monitors to display the actual temperature.

8. Then the freeze is insulated by the EHV cable/splicer.

10.

11. Once the freeze has been initiated, the gauges are monitored, the side that loses pressure, is flagged and deemed the side that requires further attention.

12. Freeze pit – once the leak has been narrowed to 50-100m length, the final excavation begins. Until signs of leaking cable oil are found.

14. After a lengthy search, this is what you are looking for, although opinions vary, constant drip can yield various amounts of accumulation. Some say it could fill a bathtub in 72 hours.

15. Once located a temporary EHV cable repair is made, while environmental remediation is done.

16. “Tinning” of the cable repair, so the lead will adhere to the cable.

17. The EHV cable repair is complete – after this the jointer must solder a copper lead connected to a sacrificial “anode” that erodes before the cable.

![]()
Jointers blog
Subscribe now to our POWER NEWSLETTER– a monthly email circulation packed with news, projects, videos, technical tips, training information, promotions, webinars, career opportunities and white papers.
Includes access to our popular JOINTERS BLOG with contributions from utility professionals, linesmen and cable jointers working on MV HV EHV cables and overhead lines typically at 11kV, 33kV, 66kV and up to 132kV.
15,000+ Subscribers. ➡