How To Carry Out A 230kV Pipe Type Pothead Replacement /Cable Freeze
Published 24 Sep 2019
-
uploaded by Chris Dodds - Sales & Marketing Manager | Thorne & DerrickAll Images Courtesy Of: Douglas Page (Instructor & Cable Splicer at Hydro One Training and Development Services).

Douglas Page is not a stranger to our Jointers Blog having blazed a trail over the past few weeks with some real ripsnorting, hardcore, high voltage images.
Let’s treat ourselves to a quick whistlestop tour of Doug’s recent contributions to the Jointers Blog as an appetite whetter to the latest serving up of his captivating EHV skills.
➡ See Also: How To Find A Single Drip Of Oil In Approximately 12km Of LPOF PILC 115KV Direct Buried Cable
115kV Straight & Stop Joint On LPLF, PILC Cables In Cable Vault

EHV Cable Splicing – 115kV Stop Joint (Taped)
")
Jointing 44kV High Voltage Submarine Cables Using 3M Cold Shrink Splices

Water Treeing in High Voltage Cables : A 230kV HPPT Termination Repair

Time for the Main Course. Bon Appetit…
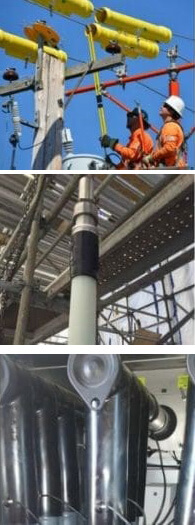
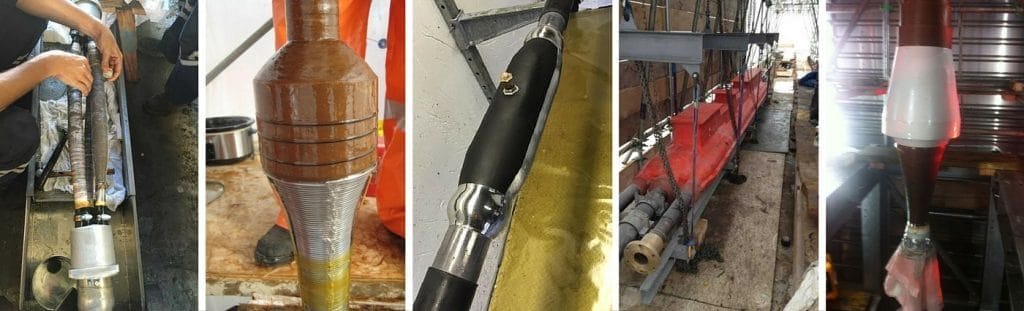
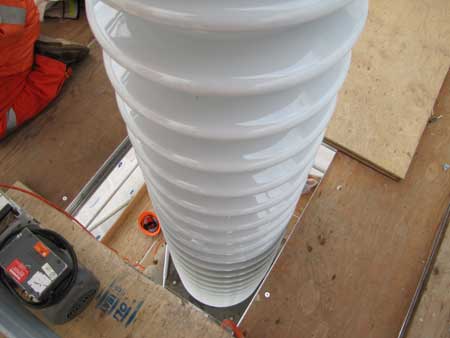
The following are the steps involved to replace the insulator on a 230kV pipe type cable.
1. All of the insulation (rubber and compound) must be removed from the single conductor stainless steel pipe
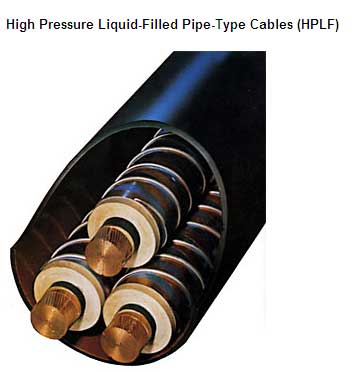
2. Once the single conductor goes underground, it goes to a trifurcating cable splice, and then the three conductors are in one pipe
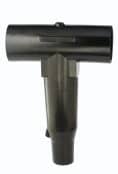
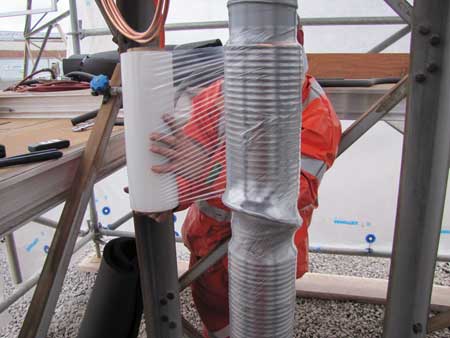
3. With the pipe exposed the jointer starts wrapping the the copper tube
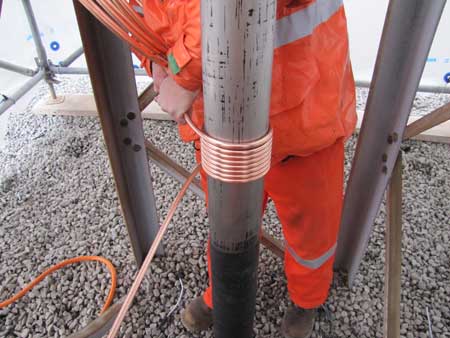
4. Continue to wrap, leaving a space in the middle and then duplicate the first section of wrap
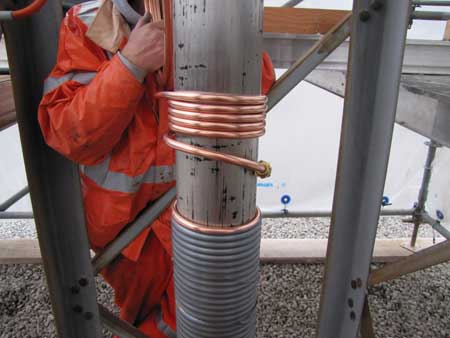
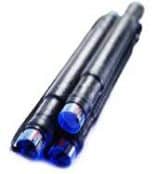
5. Once all the tubing is applied, thermocouple probes are placed at the middle and both “outside” points of the freeze to monitor temperature, and a moisture barrier is applied

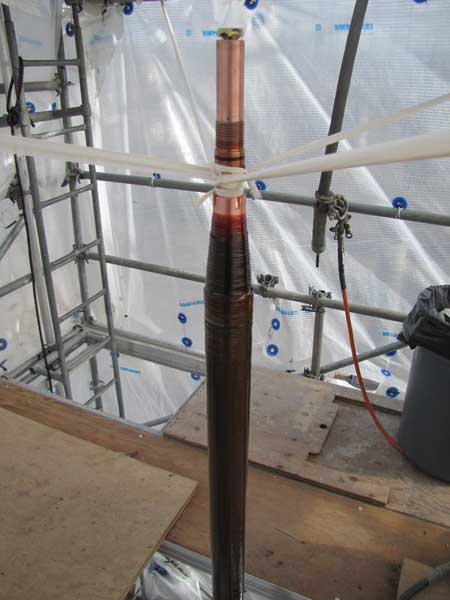
6. Heavy duty pipe insulation is installed (several layers)

7. With the wrap completely installed, another moisture barrier is applied

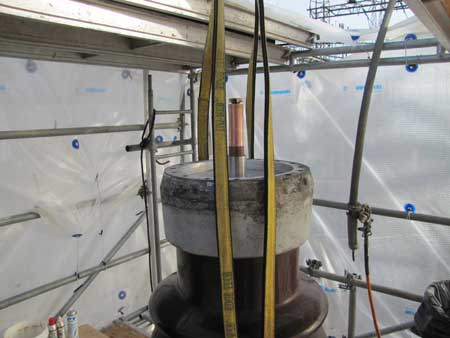
8. Before the freeze can be initiated, the oil pressure must be greatly reduced, to just above ‘static’ pressure, or the constant force of the oil would prevent the cable from freezing

9. Depending on pipe size, conductor size, length of pipe, time of year, once the liquid nitrogen is applied, it takes various amounts of time to freeze any particular cable. All three thermocouples are constantly monitored

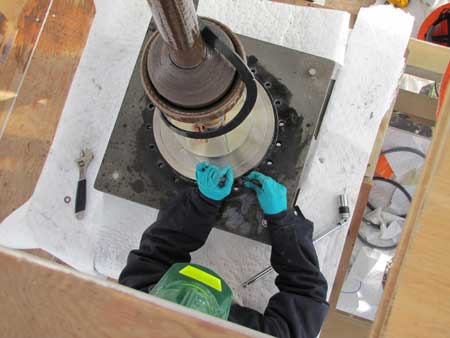
10. With the desired temperature reached, the freeze plug is active. The termination (pothead) is drained, and the old insulator is removed
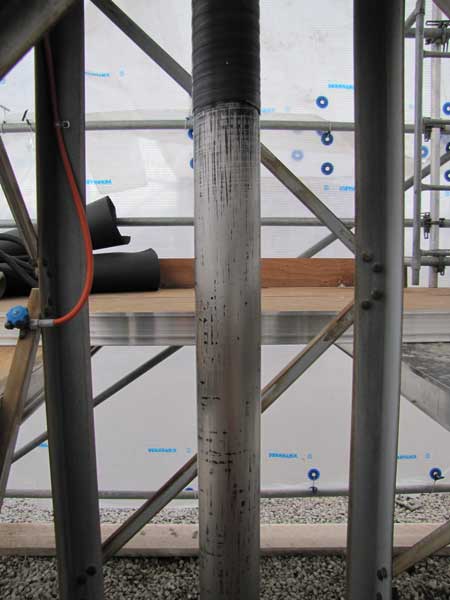
11. The cable termination is meticulously inspected and cleaned. Flushed several times with hot cable oil
12. The new porcelain is installed
13. Once the new glass is bolted back on to the cable and sealed, the Liquid Nitrogen can be shut down, and the cable begins to thaw

14. Once cable has thawed the cable termination (pothead) is slowly filled with cable oil, under vacuum
THORNE & DERRICK
Thorne & Derrick are national distributors of LV, MV & HV Cable Installation, Jointing, Substation & Electrical Equipment – servicing businesses involved in cabling, jointing, substation, earthing, overhead line and electrical construction at LV, 11kV, 33kV, 66kV and EHV. Supplying a complete range of power cable accessories to support the installation and maintenance of low/medium and high voltage voltage power systems:
- Slip-on Cable Terminations
- Cold-shrink Cable Terminations
- Heat-shrink Cable Terminations
- Cable Joints – Heat & Cold-shrink
- Separable Connectors (Euromold)
- Surge Arresters & Switchgear/Transformer Bushings
Key Product Categories: Duct Seals | Cable Cleats | Cable Glands | Electrical Safety | Arc Flash Protection | Cable Jointing Tools | Cable Pulling | Earthing | Feeder Pillars | Cable Joints LV | Joints & Terminations MV HV