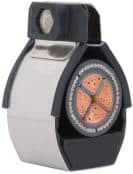
Ellis Vulcan VRT+09 Cable Cleats

Ellis Cable Cleats
Single Cable Cleats
Cable Cleat Maximum Short Circuit Test Level 104/132kA – Cleat Spacing 600/300mm
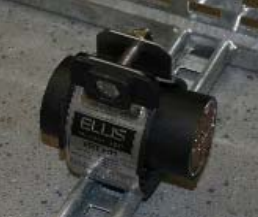
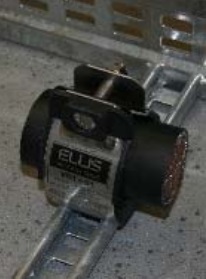
Ellis VRT+09 Vulcan Cable Cleats are manufactured from corrosion resistant stainless steel for high voltage and hazardous area industries – the compact cleat design is suitable for clamping industrial LV-HV power cables including 11kV and 33kV cables depending on short-circuit calculations according to IEC61914 calculations.
Ellis Patents VRT+09 cable cleats are suitable for securing single-way power cables between 86-104mm overall cable diameter
The NEW Twist Foot Design from Ellis Patents provides reduced installation times and labour savings when installing cable cleats.
The cleats are available in a range of sizes with range taking ability to suit cables in single or trefoil formation.
Vulcan Cable Cleats form part of the Ellis Patents range of single cable cleats – also available in stainless steel Vulcan+ trefoil cable cleats for cable diameters ranging from 19-101mm.
Ellis VRT+09 Vulcan
Cable Cleats
- Cable Cleat Diameter Min 86mm
- Cable Cleat Diameter Max 104mm
Ellis Patents Vulcan VRT+09
Ellis patents vulcan VRT+09 Cleat Dimensions
- Width 104mm
- Height 126mm
- Depth 154mm
- P n/a
- Weight 411g
Single Cable Cleat Selection Table
Specification details for Ellis Patents Vulcan VRT+09 cable cleat for single cable applications:
| Vulcan+ Cable Cleat Part Number | Single Cable Range | Dimensions | Weight (g) | |||||
| Min Dia (mm) | Max Dia (mm) | W (Max) (mm) | H (Max) (mm) | D (mm) | P (mm) | Base Holes | ||
| VRT+09 | 86 | 104 | 126 | 154 | 54 | n/a | 1 x M10 | 411 |

Ellis Vulcan VRT+09 Cable Cleats – Dimensions
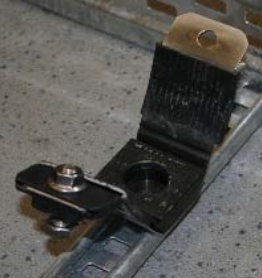
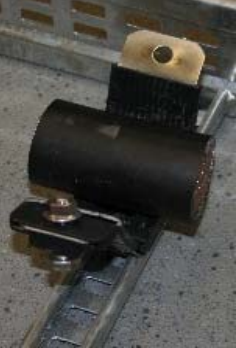
Vulcan+ Cable Cleats – Installation Instructions
Installation instructions for single way cables using Vulcan+ cleats manufactured by Ellis Patents:
 |
 |
 |
 |
| 1. Bolt the cleat to the support structure using either the single central or two outer fixing positions | 2. Install the cables, when necessary remove the removable base pad to allow for the larger cables in the cleats range | 3. Remove the flange nut. Bend the two edges of the cleat around the cables until they are parallel. Locate the screw into adjacent hole and replace the flange nut |

See Ellis Patents for further details about cable cleats for LV-HV cable support and retention.