Cabinet Base Sealants – Virgin Media Approved Specification (Filoform 205884)

Cabinet Base Sealants – Virgin Media Approved Specification (Filoform 205884)
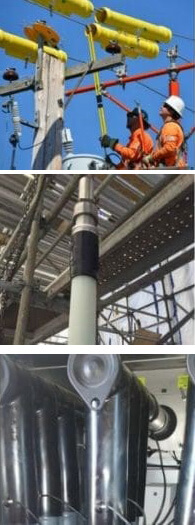
Sealing Cabinets
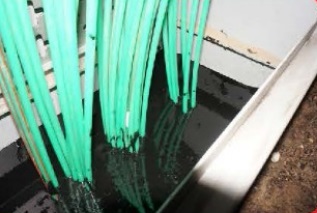
Filofom cabinet base sealant is used to seal the base and cable ducts in Virgin Media’s street cabinets and feeder pillars.
The sealant is suitable for use in LV distribution cabinets, public lighting cabinets, cabinets for traffic control and outdoor transformer station installations.
Filoform’s cabinet base sealants and duct sealing system has been tested and evaluated by Virgin Media approved specification (Filoform 205884) and is suitable to use in their network.
Filoform 205884
Cabinet Base Sealants
Features
- Filoform Sealant 205884
- Product Name: Cabinet Base Sealant – Virgin Spec- 2.5L
- Colour: Black
- Content: 2500ml
- Easy to use sealant and accurate filling process when pouring the resin
- Seals the cable ducts against water and gas pressures
- Prevents ingress of moisture, pests and the instrusion of weeds, roots and plants
- Improves the climate inside the street cabinets and transformer stations
- Decrease’s interference of the electrical equipment
- Extends the life of the components
- Quick and easy to apply sealants
- Good flow properties
- Self levelling characteristics
- Good adhesion
- Smooth and non-tacky surface
- Re-enterable therefore cables can be added in future

Filoform’s cabinet base sealants & duct sealing system has been tested and evaluated by Virgin Media
| Sealant Properties | Unit | Value |
| Potlife (process time) 5°C | minutes | 30 |
| Potlife (process time) 23°C | minutes | 10 |
| Potlife (process time) 35°C | minutes | 7 |
| Gel-time | minutes | 23 |
| Viscosity (mixture) 25°C | Pa.s | ca. 3 |
| Density | g / cm³ | 1.4 |
| Hardness | Shore D | 52 |
| Tensile strength | N / mm² | 4 |
| Water absorption (30d/23°C) | % | < 1.0 |
| Weight loss 28d/120°C | % | 0.8 |
| Surface structure cured under water | no bubbles |
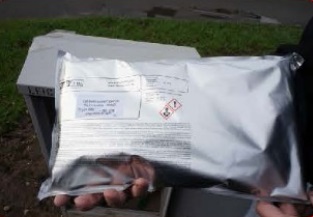
Cabinet Base Sealing Instructions
Please note: additional components needed to complete the installation include: Kiln Dried Sand, Trowel and Spirit Level
 |
 |
 |
 |
 |
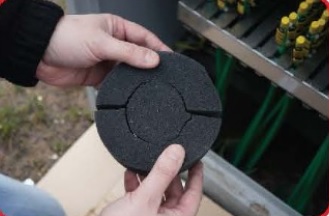
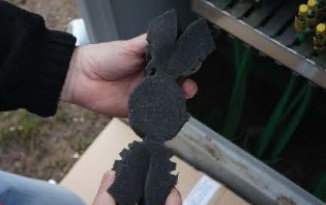
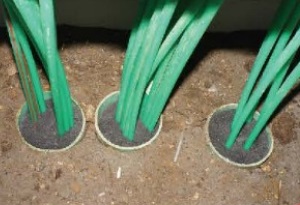
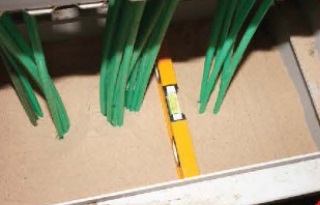
| Step 1 – Remove the circular foam disks from the box | Step 2 – Bend the two sides of the foam apart | Step 3 – Push the foam into the duct ensuring the centre pieces of the foam is in the centre of the micro ducts. The foam will then sit nicely around all the tubes | Step 4 – Make sure each duct has the foam pushed in leaving 20mm space at the top | Step 5 – Open the kiln dried sand |
 |
 |
 |
 |
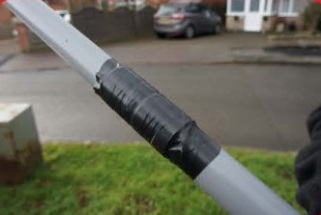 |
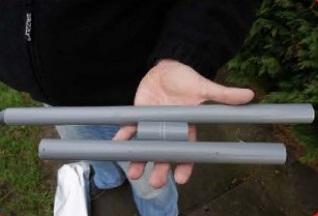
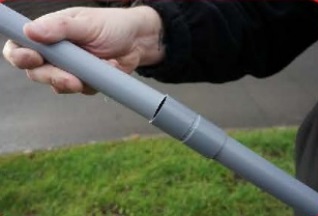
| Step 6 – Pour the kiln dried sand in the base and over the ducts. You will require a minimum 5mm of sand | Step 7 – ENSURE the sand is level, this is very important | Step 8 – Remove the 2 lengths of pipe and joining piece from the box | Step 9 – Join the 2 pipes together using the joining piece | Step 10 – Wrap PVC tape round to secure |
 |
 |
 |
 |
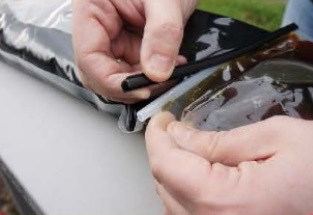 |
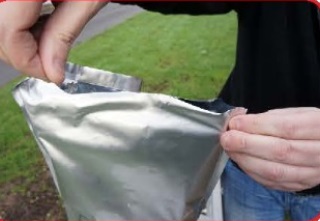
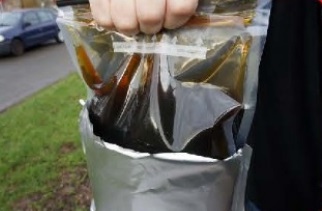
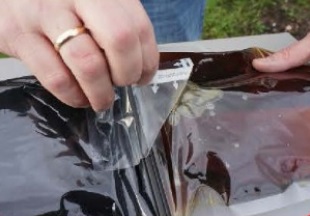
| Step 11 – Remove the silver foil resin bag from box | Step 12 – Rip open silver foil bag | Step 13 – Lift out the clear resin bag | Step 14 – Remove the clear sticker | Step 15 – Remove the plastic central divider, this will allow the 2 sides of the resin to start mixing |
 |
 |
 |
 |
|
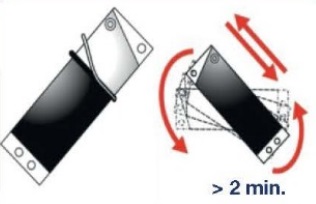
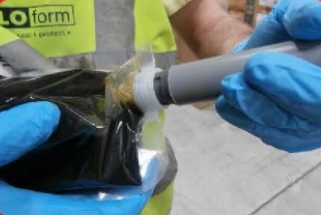
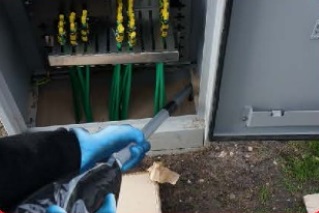
| Step 16 – Tilt the bag up and down to mix the resin for 2 minutes. Make sure to wear protective gloves when mixing and applying resin | Step 17 – Insert and twist to secure the pouring tube into the resin bag | Step 18 – Direct the pouring tube at the base of the cabinet and the resin will start flowing after about 5 seconds. Once the hard to reach places have been completed, you can snip the corner of the resin bag to speed up the installation | Step 19 – Make sure all the resin is used to fill the ducts and the base of the cabinet | |