

Blog
Taking Care Of Insulating Gloves
June 27th, 2018
-
uploaded by Chris Dodds - Thorne & Derrick Sales & Marketing Manager
As Main UK Stockists for the CATU Electrical range of insulating gloves Thorne & Derrick regularly are requested to provide care and maintenance advice to ensure gloves provide adequate and ongoing electrical safety and protection to the wearer.
For insulating gloves to function effectively and in accordance with their specification they must be carefully and regularly cleaned, checked and tested – if damaged always replace. If uncertain always replace.
The insulating gloves will fail to provide hand protection against electrical shock if the surface integrity has been comprised by “wear and tear”.
Clean
Keep gloves clean. Similar to arc flash clothing, the cleaner the owner keeps their pairs of rubber insulating gloves the less risk of electric shock. Chemicals, oils, and other petroleum-based products can cause rubber to weaken and break down, so if the gloves become contaminated on the job, wash them off with tap water and a mild, bleach-free detergent to cleanse and remove debris and contaminants. Gently dry gloves with a clean cloth.
Check
Check for embedded materials. Due to the thickness of the insulating glove material the glove surface can be damaged by small, sharp particles of foreign material, such as copper cable particles, to work their way into the gloves and go undetected. Even though the embedded debris may not be obvious or penetrate entirely through the wall of the glove it still creates small holes and weak points that can compromise the wearers electrical safety. Before each wearing roll the gloves between your hands to feel for embedded particles. If any are found ensure the insulating gloves are electrically tested to verify their status for safe use or disposal.
Test
Air test them before every wear. Even minuscule pinholes in electrical gloves can be dangerous, so it’s extremely important to air test gloves before wearing them – each and every time. To air test the gloves simply hold the gauntlet (sleeve) end of it closed trapping air inside. Then tightly roll the closed end of the glove downward toward the fingers. If no air leaks out, the glove is free from holes. Have gloves electrically tested twice a year. Insulating gloves need to be electrically tested at least every six months to ensure that they’re still able to protect against low, medium or high voltages. Follow the stamped dates on the gloves closely. If you end up not using a pair of gloves within a year following their electrical test have the gloves retested before putting them back into use.
Store
Store gloves properly. Heat, UV rays and pressure from other objects can all cause damage to gloves – so store them carefully when they’re not in use. Before putting them away, ensure that the gloves are clean and dry. Rubber insulating gloves are best stored in cool, dark places, away from chemicals and heat sources. If you store gloves in a bag or container with other items you must ensure that nothing is piled on top of the gloves, or otherwise pushing them out of shape.
Insulating Gloves – Class & Category
Should you require any further advice about the care, maintenance or selection of insulating gloves please do not hesitate to contact us.
| Insulating Gloves Class | CATU Electrical Code | Category | Thickness | Length | Colour | AC | kV | DC |
| Class 00 | CATU CG-05 | AZC | 0.5mm | 360mm | Beige | ≤ 500V | 0.5kV | 750V |
| Class 0 | CATU CG-10 | AZC | 1mm | 360mm | Beige | ≤ 1000V | 1kV | 1500V |
| Class 1 | CATU CG-1 | RC | 1.5mm | 360mm | Bi-Colour | ≤ 7500V | 7.5kV | 11,250V |
| Class 2 | CATU CG-2 | RC | 2.3mm | 360mm | Bi-Colour | ≤ 17000V | 17.5kV | 25,500V |
| Class 3 | CATU CG-3 | RC | 2.9mm | 360mm | Bi-Colour | ≤ 26500V | 26.5kV | 39,750V |
| Class 4 | CATU CG-4 | RC | 3.6mm | 410mm | Bi-Colour | ≤ 36000V | 36kV | 54,000V |


Specialist Distributors Of LV MV HV Electrical Equipment
We supply Product Categories: Duct Seals | Cable Cleats | Cable Glands | Electrical Safety | Arc Flash Protection | Cable Jointing Tools | Cable Pulling | Earthing | Feeder Pillars | Cable Joints LV | Joints & Terminations MV HV

Ellis Patents | Nexans Euromold | Pfisterer CONNEX | Prysmian – Distributors
Damaged Cables – Strikes & Products To Repair Cable Damage
June 27th, 2018
Damaged Cables – Some Cable Repair Solutions & Products
-
uploaded by Chris Dodds - Thorne & Derrick Sales & Marketing Manager
In this following post we highlight several causes of cable damage to low voltage underground power cables courtesy of a selection of case studies from SP Energy Networks.
We also explain and demonstrate product solutions for the repair of damaged cables.
Damage to live underground cables during excavation works is the cause of an increasing number of accident which can result in severe burn injuries to workers and disruption to consumer electricity supplies.
Occasionally such accidents prove fatal. Frequently such accidents were avoidable.
Cable damage is usually caused by excavating machines – hand held tools such as pneumatic drills, crowbars, pins, picks and forks also expose workers to potential sources of danger when digging around underground cables.
Thorne & Derrick have been distributors for 3M Electrical since 1985 and can provide a range of reliable and easy to install Cable Repair Products – this includes Scotch Tapes, Scotchcast Joints and Cold Shrink Tubes to provide effective re-instatement of cable sheath jackets on all types of LV MV HV cables in onshore and offshore locations with safe or hazardous area workplace classifications.

Cable Repair Products
3M Electrical
Scotch Tapes, Scotchcast Joints
& Cold Shrink Tubes
Depending on the cable location and workspace restrictions, both physical and atmospheric, a cable repair solution can be provided by 3M Electrical – most commonly their 3M HDCW heat shrink wrap-around cable repair kit is used to repair both LV and 11kV/33kV cables distributing medium/high voltage electricity. Due to the ease of installation, water-tight sealing and versatile range taking capability of heat shrink cable repair kits coupled with relative low-cost efficiency compared to cable replacement the 3M HDCW range has been adopted by contractors for sheath repairs on LV-HV cables.
Where hot-working is not permitted due to the presence of flammable gas and access to an open end of the cable circuit is achievable, on de-energised or isolated cable circuits, the range of cold shrink tubings can be used to achieve primary electrical insulation for all solid dielectric (rubber and plastic) insulated wire and cable splices rated to 1000 volts.
Alternatively, if the installed cable cannot be accessed at mid-circuit a taped cable repair can be used. Where the the cable damage has penetrated into the cable armour a cable joint would be recommended – suitable resin cable joints are available for both industrial non-hazardous and hazardous area cable joints.
See the following LinkedIn Post from IMCORP – based in the USA but with global operations IMCORP provide the best diagnostic services for medium/high voltage power cable systems and utility asset management systems. Here they show how PVC insulation tape has been applied to attempt to cosmetically patch the damage but not recover the insulation or protection level required to prevent future cable failure. So the tape has concealed the damage but not repaired the problem.
Cable Repair Despair

Damaged Cable Case Studies
1 Low Voltage Mains Cable Damaged With Underground Moling Appliance
Image 1 highlights a situation when a moling device came into contact with a low voltage (.3(4) PILC) mains cable, the operatives task was to install an underground pipe at the locus. Cable damage during excavation works and new installations on underground cables and buried utility pipes is a common cause of power cuts and outages.
During the works the moling device inadvertently came into contact with the cable causing a loss of electricity supplies to customers. This cable construction is an older type cable called PILC (Paper Insulated, Lead Covered) – looking at the PILC cable it can clearly be seen that the outer skin of the cable is covered in taped armour, this type of cable was widely used on the underground electricity network.
SP Energy Networks cable records were supplied to the operatives by the contractor and were accurate, cable locator on site, depth of cable 600mm. The investigation into this incident found that contact with the electricity cable was avoidable if adherence to HSG47 had been implemented.
In conclusion, setting a moling device in the direction of underground electricity cables is not recommended – this type of action could lead to serious injuries.

Image 1
2 Low Voltage Mains Power Cable Damaged In Cable Trench
Image 2 shows latent cable damage to a low voltage mains cable which was not reported to ScottishPower when the cable jointing contractor installed the cable ducting over the electricity cables.
Customers in the area were experiencing loss of supplies to their properties and ScottishPower engineers located the loss of supply problem to the above location.
As the damaged cable was not reported to ScottishPower the situation resulted in damage to the newly installed cable ducting – a situation that could have been avoided if the cable strike had been reported when it happened, as they installed the ducting on top of ScottishPower apparatus.
Please note: separation between underground utilities is important to avoid damage to other utilities apparatus. Reporting cable strikes at the time of occurrence will avoid inconvenience to customers and reduce costs to third parties. Prior to any underground cable excavations taking place cable records should always be consulted. Always assume cables are present and live until proved otherwise.

Image 2
3 Low Voltage Waveform Cable Strike & Damaged By Excavator
Image 3 clearly demonstrates the impact on the underground ScottishPower network when an excavator came into contact with a low voltage cable (4 Core 240sqmm Waveform BS7870). The contractor’s task was to carry out excavations to install underground drainage apparatus with ScottishPower cable records and cable locator on site.
Contractors on site had installed the cables previously and were clearly aware of the location of the cable route. During the excavations to progress the drainage works the high voltage cable was located, however an excavator came into contact with the low voltage cable, despite a ScottishPower sub-station being situated in close vicinity to the works taking place.
Fortunately on this occasion no injuries were sustained to the operatives. Excavations require to be planned professionally to avoid cable strikes/serious injuries such as electrocution or arc flash blast to operatives.

Image 3
4 Low Voltage Service Cable Repair & Cable Strike Damage
Image 4 highlights a repair to a ScottishPower low voltage service cable. The cable was evident on the contractor’s cable records – however the operatives still managed to strike the cable with a mini-excavator with the potential to cause injuries to himself and his colleagues as well as serious cable damage.
Prior to main excavations taking place trial holes should always be carried out to locate the line and depth of all utilities throughout the project. Before the use of a mechanical excavator takes place a risk assessment should always be carried out to confirm that it is safe to progress the works with the mini excavator/JCB/track machine etc.

5 Low Voltage Cable Damage By Mini Excavator Strike
Image 5 highlights the consequences of utilising a mini excavator in close proximity to a low voltage cable.The low voltage cable strike occurred when the operatives were carrying out excavations to install kerbing in a grassy area.
In this case the cable strike was entirely preventable, if the contractor/operatives had adhered to HSG47 the cable strike would not have occurred. Engaging an excavator prior to hand excavating / locating underground services is a clear case of non adherence to HSG47 with the real possibility of serious injuries to personnel. To avoid cable strikes to the LV HV underground cable network seek advice prior to excavations commencing.

Image 5
6 Low Voltage Cable Damaged At Tee Cable Joint
Image 6 highlights a low voltage cable strike to ScottishPower’s underground electrical network. The service cable, 0.225(2) was damaged at the lead tee joint, this type of cable is an older type cable wrapped in taped armours. The task for the operatives at this location was to install street-lighting ducting for the local authority. The cable strike was not reported to ScottishPower at the time of the incident occurring, for some reason the operatives on site presumed that the cable was out of use, the cable was in fact live. When a cable strike has taken place the correct course of action is to evacuate the excavation immediately, secure/protect the area and report the incident to the Network Operator.

Image 6
Specialist Distributors Of LV MV HV Electrical Equipment
We supply Product Categories: Duct Seals | Cable Cleats | Cable Glands | Electrical Safety | Arc Flash Protection | Cable Jointing Tools | Cable Pulling | Earthing | Feeder Pillars | Cable Joints LV | Joints & Terminations MV HV
Ellis Patents | Nexans Euromold | Pfisterer CONNEX | Prysmian – Distributors
Lace Up Cable Socks – A Guide For Users When Pulling Cables
June 26th, 2018
Cable Socks | Temporary Strain Relief LV MV HV Cable Pulling
-
uploaded by Chris Dodds - Thorne & Derrick Sales & Marketing Manager
The following short article has been provided as guidance for the use of cable socks – specifically lace-up cable socks are used to pull and support cables mid-span and employed where a fitting or connector prevents a standard single or double-eye type cable sock from being slipped onto the open cable end.
Lace-up cable socks are typically used to “pull-in” and support electricity cables in a vertical or sloping position and is also ideally suited for use in manholes where the longitudinal movement of cables, caused by road vibration, needs to be monitored and checked.
Cable socks are a temporary use product not designed for fixed permanent location.
Using Cable Socks
- Start the lacing from the ‘eye’ end or anchoring end of the cable sock
- Thread the lace through the first two loops of the split and pull through until the laces are centered at this point
- Don’t pull the lace too tight at this stage. Leave a space between adjoining loops roughly equal to the width of one diamond of the mesh
- Continue down the length of the cable sock. Try to maintain equal tension and equal spacing throughout as this leads to a more stable and equal grip
- As you continue down the length, pull the open sides of the sock as wide apart as required
- Try to achieve an even and neat lace-up as this assists with the strength of the sock when pulling cables
- Finally, tie the ends of the lace once or twice round the end of the cable sock twisting the ends together securely. Excess lace can be cut off
- Add any additional support as required – banding is recommended
Where cables must be pulled through ducts cable lubricant is recommended to reduce friction damage to cable sheaths and ensure a smooth and low-tension installation without inflicting damage to the cables.
Cable socks are manufactured in galvanised steel, stainless steel or non-conductive (Aramid) material – the socks can be used with swivel links which are cable pulling fittings attached between the sock and the draw rope to reduce twisting.
 |
 |
 |
 |
 |
 |
 |
 |

Press Release | Thorne & Derrick Appointed Approved Stockist for UK Leading Cable Pulling Equipment Manufacturer
Cable Pulling Equipment
Thorne & Derrick International are the UK’s leading stockist and supplier of Cable Pulling & Cable Laying Equipment for the installation of underground cables and overhead lines up to 400kV – the products support cable pulling teams to install LV MV HV cables into trench, cable duct, risers and all forms of cable containment.
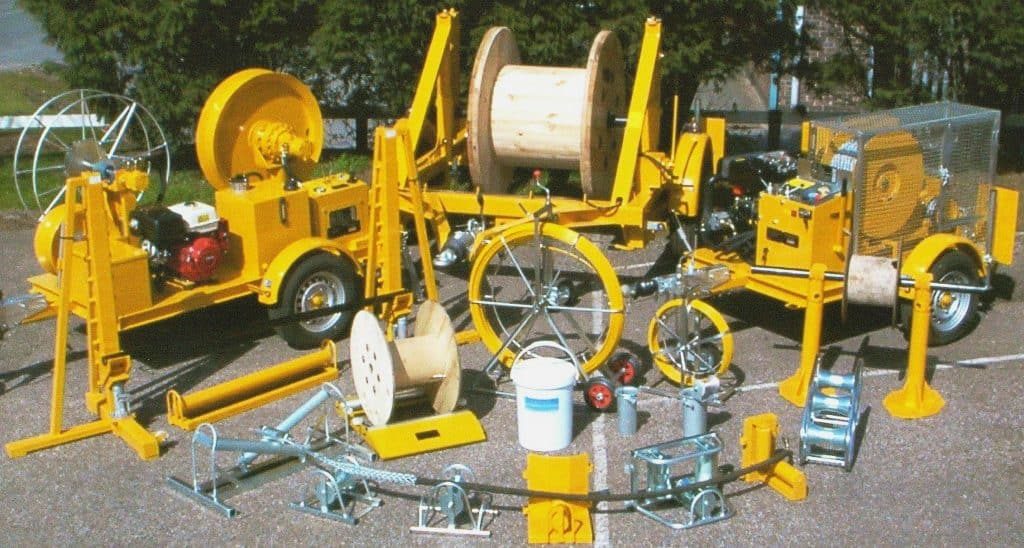
Duct Rods | Cable Jacks | Cable Rollers | LV MV HV Cable Pulling & Laying Equipment
Why Would I Choose A Cable Abandonment Kit Over A Cable End Cap?
June 25th, 2018
A series of How-To videos for repairing, jointing and terminating cables using 3M Cold Shrink & Scotchcast products.
-
uploaded by Chris Dodds - Thorne & Derrick Sales & Marketing Manager
Cable Abandonment Kit or Cable End Cap?
This video by 3M Electrical explains why you would choose a cable abandonment kit over a cable cap.
3M cold shrink cable abandonment kits (live cable end seals) are used to temporarily or permanently seal power, control and instrumentation cables – this includes the abandonment of redundant or decommissioned low voltage offshore, marine and shipwiring power, control and instrumentation cables in both safe and hazardous area workplace locations, such as Zone 1 or Zone 2 according to ATEX Directive.
Unlike cable end caps the cable abandonment kits include a copper earth braid system for the safe grounding off cables in the event of future planned or accidental energisation of the electrical cable circuit – the cable sheath and cores should be covered and protected with copper earth braid and bonded using constant force springs to effectively short-circuit the cable system if energised. Copper binder wire and shielding braid is used to abandon and ground the individual cable cores – this is demonstrated in the 3M Training video below.

Cold Shrink – invented by 3M over 40 years ago and now the preferred technology for heat-free jointing, terminating, sealing and abandonment of LV HV cables
We hope you find this video informative and educational, contact T&D for technical support, quotations and stock availability for 3M Cold Shrink Cable Abandonment Kits.
➡ Visit 3M Electrical for further information about joints, terminations, tapes and insulation to seal, repair, splice and connect LV MV HV cables.

Cold Shrink | Joint | Terminate | Seal | Repair | Splice | LV MV HV Cables | 3M
- 3M Electrical Products Stocked By Thorne & Derrick International
How To Apply 3M Cold Shrink Tubing
June 25th, 2018A series of How-To videos for repairing, jointing and terminating cables using 3M Cold Shrink & Scotchcast products.
-
uploaded by Chris Dodds - Thorne & Derrick Sales & Marketing Manager
3M Cold Shrink Tubing
This video by 3M Electrical shows how to apply 3M Cold Shrink Tubing safely.
3M Cold Shrink Tubing is a series of open-ended, tubular rubber sleeves, which are factory expanded and assembled onto a removable core – the cold shrink tubes are supplied for field installation in a pre-stretched condition without requirement to use any activation or installation tools.
Cold shrink tubes are available in both EPDM rubber and silicone.
The 3M video shows how to install the tubing by unwinding the removable core allowing the tube to shrink and form a waterproof cable seal. Cold Shrink is quicker, easier and safer to install than heat shrink tubing alternatives.
Cold Shrink – invented by 3M over 40 years ago and now the preferred technology for heat-free jointing, terminating, sealing and abandonment of LV HV cables
We hope you find this video informative and educational, contact T&D for technical support, quotations and stock availability for 3M Cold Shrink Tubing.
➡ Visit 3M Electrical for further information about joints, terminations, tapes and insulation to seal, repair, splice and connect LV MV HV cables.
Cold Shrink | Joint | Terminate | Seal | Repair | Splice | LV MV HV Cables | 3M
- 3M Electrical Products Stocked By Thorne & Derrick International
